java.lang.IndexOutOfBoundsException

Experiencing a confusing error message when you sync with your PC that looks kinda like this?


If so, thanks to the help of one of our users and his server log, we've narrowed down the source of the problem. The error occurs when users try to sync the "Unplayed Audio Podcasts" playlist when they have more than 100 unplayed audio podcasts. We aren't retrieving the tracks for this "built-in virtual playlist" correctly, which causes the error.

Right now there are three workarounds for this issue:
  1. Unselect the "Unplayed Audio Podcasts" playlist when you sync - everything else should sync fine.
  2. Sync with your Mac instead ;)
  3. Reduce the number of unplayed audio podcasts in your iTunes media library, either by marking some as played, or by removing them. You'll need to get the count down to less than 100.

We apologize for the inconvenience in the meantime. While investigating this issue, we also came to realize that users who have a large number of podcasts may also be experiencing timeouts when trying to retrieve the songs in this playlist. We will be fixing both of these bugs and updating the iSyncr WiFi Server for PC on our website very soon.

UPDATE: The fix is now included in iSyncr WiFi Server 1.4.2 and later, which can be downloaded from
jrtstudio.com.

How to Launch iSyncr on Mac Automatically

On devices running 2.3 (Gingerbread) and earlier, iSyncr has the unique ability to keep users from installing big bloated software on their Mac just to do a sync with iTunes.  The drawback to this ability is that syncs are not automatic.  If a user wants to do a sync, they have to open of their device's storage in Finder and run iSyncr.  Not too hard, but some people want a little more automation.  If you are one of those people, read on.

With the latest iSyncr WiFi server, you can now set up automatic launching for USB, even if you are not using the WiFi application.  This tutorial will show you how.


1.)  Download and install the iSyncr WiFi server
2.)  Once installed, open the Settings


3.)  Now go to "USB Settings" and choose "Auto Launch Sync"
4.)  Press Save


5.)  Now plug in and mount your device's storage
6.)  Success!  iSyncr begins running immediately!

How to Use iSyncr WiFi with Tasker

In iSyncr WiFi 1.4.1, we introduced the ability for Tasker to launch an iSyncr WiFi sync.  Why did we go through this trouble?  Because you can do some pretty powerful things with it!  iSyncr WiFi is great if you want to sync on a schedule, but what if you want to sync every time you get home?  What if you want to sync every time you plug your device into its power cable?  Then this is the feature you've been wanting.

Let's try and use this new feature.  We are going to setup Tasker to start a sync when we connect to our home network.  That way, after you leave your house and go to work, the gym, the grocery store, walk the dog, whatever, the tunes you were rocking out to get updated in iTunes.


 1.)  Purchase Tasker (http://tasker.dinglisch.net has a trial version)
2.)  Launch Tasker
3.)  Press the "New" button to add a new profile
4.)  Give the new profile a new (if you want to)
 5.)  Select "State" as the first connect, since we are wanting when WiFi connects, which is a state change
 6.)  Now select Wifi Connected, since that is the event we want to trigger a sync
 7.)  Enter in your home network SSID.  This appears to be case sensitive, so make sure you have the capitalization correct
8.)  Press Done.  We now have the event set up, we just need a "Task" aka, something to do when the even happens
 9.)  Press "New Task"
 10.)  Press the "+" to configure our new action
 11.)  Press "Misc" so that we can configure a custom event.
 12.)  We are going to configure an "Action Intent" to fire off iSyncr WiFi
 13.)  In the action box, type "com.jrtstudio.iSyncr.WiFi.Sync".  This will launch a WiFi sync.
14.)  Change the Target to "Service" as shown
15.)  Press "Done", as we've configured out "Action Intent" task.
 16.)  Now you can press "Test" and wait a second.  You should see a notification that a sync has started.
17.)  Now press "Done" and "Apply" and go do something fun outside.  When you come home and your device reconnects to your home network, Tasker will launch an iSyncr WiFi sync and keep your device up to date!

Why Do I See Multiple Albums in My Music Player?

Why do I see multiple albums in my music player? This question comes up from time to time and we answer it. Sometimes people just leave a bad review (I'm not sure if those people will read the website), however, this problem is certainly fixable. Let's take a look at some steps that should clear this up.


Cause #1 - The songs are not listed to have the same album artist or are not listed as a compilation in iTunes.

Should your music player just put all songs with the same album name together? Probably not. Do you own a greatest hits album? What if you own "Greatest Hits" by Michael Jackson and "Greatest Hits" by Pink Floyd? Would you be happy if they were combined together in your music player? Maybe! But, maybe not. The point here is that having the same album name is not always enough information to clump the two albums together. Enter "Album Artist" and "Compilation" in iTunes.

Let's take a look at the album "I Love The 70's" in iTunes


As we can see, the artist is not the same for every song. But it is the same album. Unfortunately, your music player may not see it this way...
The good news is that we can fix this up in a few simple steps....
First, select all of the songs in the album.  (Tip: Select the top one, then hold down shift and select the bottom one)
Now right-click and select "Get Info"

You'll need to confirm that you realize that these changes will affect all of the files selected.

Now we can do one of two things.  You can set the "Album Artist" or...

You can set that these songs are part of a compilation.  Now let's re-run iSyncr and see what we get.
Wait!  It still looks bad!  What happened!!  Well, iSyncr doesn't remove songs unless you ask it to.  In this case, I forgot to check "Remove Music Not In These Playlists" in the USB app, or select "Remove Abandoned" in the WiFi app.  So we are looking at the old songs and the new songs.
After telling iSyncr to remove the old versions of the songs, I now have what I expected all along.  One album.  Woot!

Cause #2

If you tried the steps above and you still see two copies of an album, perhaps there are two copies on the device?  For this cause, we've got a whole other blog entry.

Why Do I Have Duplicates?

This question is a little too complicated to be fully explained in the FAQ, so we are moving it over to the new dev blog.  While you are here, feel free to subscribe to the blog!

Let's first define what we are talking about.  "I have duplicates" is a little too vague to give a generic solution.  Are you seeing duplicate files on the device's memory?  Or are you seeing duplicate files in your music player? Which music player?  Which Android device?


For now, let's narrow the question to "Why am I seeing the same song show up twice in my music player?"
There are two reasons you could be seeing this.
  1. You do have a duplicate file on your device's storage, we will go through all the possibilities here a little later.
  2. Your device's media cache is corrupt and needs to be reset.  
Moving on, let's make the question "Why am I seeing the same album show up twice in my music player?"
This one is more complicated.  In fact, we've made a whole other post for it.

Now, let's tackle the last question "Why do I have multiple files on my device's storage?"
If you know there are duplicate files, then you probably already know their locations.  However, we've made a list of places to look if you suspect that there are multiple files on your device.  This list should help jar you memory, but we strongly suggest using the search tools built into your Mac or PC or Astro File Manager to simply search for the duplicate file and delete it.  We will keep this list up to date, so let us know if you found a reason that we missed!

  1. Have you downloaded the song from Amazon?  If so, you might have another copy of the song in the "AmazonMP3" folder. 
  2. Have you updated a song?  For instance, if you change the "artist" field of a song and then sync again, you might end up with two copies of what is essentially the same song.  You can fix this by check "Remove Music Not In These Playlists" in the USB app, or select "Remove Abandoned" in the WiFi app.
  3. Do you have multiple copies of the same song in iTunes?  Are you not sure if you do?  In iTunes, go "File->Display Duplicates".  iTunes will let you know if it thinks two songs might actually be the same.  You can delete the duplicates and then go "File->Display All" when you are done.
  4. If your Android device has two storage areas, have you synced the same album to both the internal and external storage areas?  That will certainly cause you to have duplicates.
  5. Have you changed the folder iSyncr syncs to? Some people like to sync to the "Music" folder instead of the "Syncr" folder.  After making this change, you might have music in both folders.
  6. Have you used software other then iSyncr in the past?  If so, you might have duplicates on your device if you haven't removed whatever the other application did.
  7. iSyncr created duplicates.  This shouldn't happen and we currently don't know of any reason it would.  If you do find this behavior, email us and give us the two different paths that music was copied to and we will work with you to fix it! If you believe that iSyncr is creating the duplicates, please contact us at [email protected]
If you have worked through 1-6 and are still seeing the duplicates, you may want to try and reset your device's media cache. Reset the cache.

Introducing The iSyncr WiFi "Sync Now" Shortcut

In iSyncr WiFi 1.4.1, we introduced the "Sync Now" shortcut.  You've always been able to schedule syncs based on time, but manual syncs required opening the app and pressing the "Connect" button and then the "Sync Now" button.  This shortcut allows you to do manual syncs from your home screen.

Just added new music to iTunes?  Use this tutorial to put a "Sync Now" button on your home screen so you can bring over that new music in one touch.


Step one is to select "Menu->Add" from the home screen.

Step two is to select "Shortcuts" as the type of object to add to the home screen.

Step three is to select the "Sync Now" shortcut and place it on the home screen.

Step four is to press the "Sync Now" button whenever you want to launch a sync!

License File Missing Fix (for PC Users)

During the initial configuration, some iSyncr users see an error similar to the following...

Launch Path = C:\Users\Lee\AppData\Local\Temp\WPDNSE\SID-{10001,SECZ9519043CHOHB,12351995904}\syncr

iSyncr License File Missing!
Try the following to resolve
1.) Check that you are accessing iSyncr from a removable drive (F, G, H, etc..) in "My Computer"
2.) Run iSyncr on your device and press the "Installation" button to create a new license file
3.) E-mail [email protected] for support


This error might be caused by, well, the license file being missing.  However, for many users, either tutorial was not followed correctly or the tutorial is not correct for their device.  With 400+ Android devices (and growing), the iSyncr tutorial is not always accurate on how to set the device up.  Unfortunately, manufacturers have chosen many different ways to put a device in "Mass Storage" or "Disk Drive" mode.  In fact, some manufactures have even changed where the setting is in the menu from one software update to the next.

Our end goal is simple.  Get the device in "Mass Storage" or "Disk Drive" mode.  You may have to consult your user manual to do this.  Some devices even need USB drivers to do this.  Once done, the device should show up as a removable drive in Windows, instead of a device.  Then you can simply run iSyncr.exe and quickly get your music onto your device!

NoteIf you find that the tutorial (Help->Tutorial) is incorrect for you device, please let us know.  You'll help lots of other people out.

Using iSyncr WiFi

Connecting to your Server

To connect to your iSyncr WiFi Server, first make sure of the following:
  • It's actually running on your computer
  • Your computer and Android device are connected to the same network
  • Your firewall on your computer and router allow connections to the port selected in your server settings
Second, go to the main menu in iSyncr WiFi and hit the connect button. The app will try to automatically discover all servers on your network. Note that this may take up to a minute, though it might be sooner. Patience is a virtue =)


Note: If you can't connect within 60 seconds, then you may need to go the manual route. Click on the Enter Manually button and enter the IP address and port of your server.


If you can't connect, either via auto-discovery or via a manual connection, there is probably some kind of network issue going on. Most of the time, this is an issue with the firewall or router settings, although in some cases, a connection will fail if iTunes cannot be loaded. Read our Firewall Guide for Windows or our Firewall Guide for Mac OS X to make sure your firewall settings match our recommendations. If you still can't seem to connect, e-mail [email protected] for support.
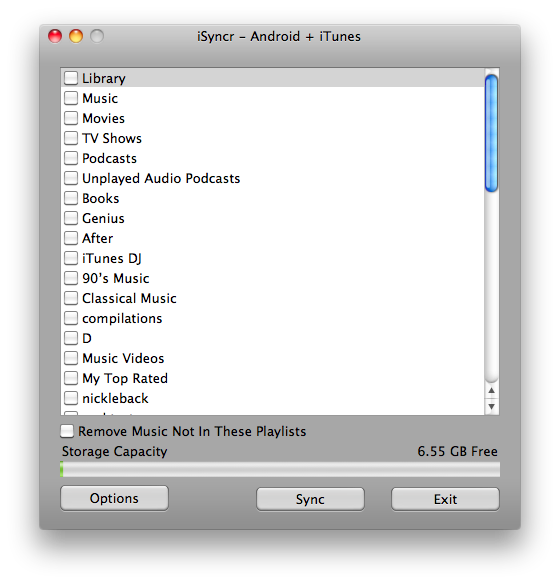
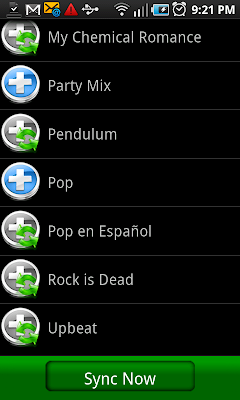
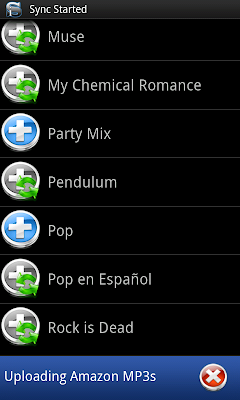
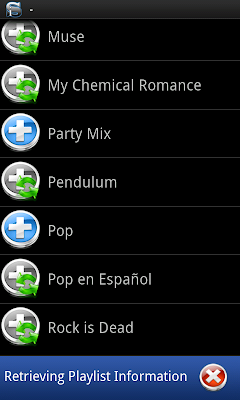
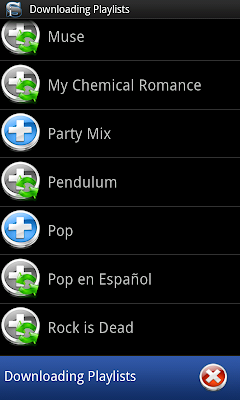
Once connected, you should see a list of your iTunes playlists on your computer. Both playlists and tracks use icons to indicate their sync status:


Tap each playlist that you'd like to sync. Tap a selected playlist, and it will show you the tracks in that playlist. Hit the back button to go back to the list of playlists.


Starting a Sync

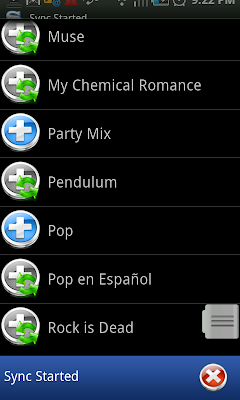
To start a sync, simply hit the green Sync Now button. The sync will go through the following steps:

Uploads Amazon MP3s
This step only happens if you've enabled it in the settings. Songs in your Amazon MP3 directory on your phone will be uploaded to your server in the directory you specified and added to the playlist you specified. Tracks will be removed from disk if you set Delete After Upload to true.

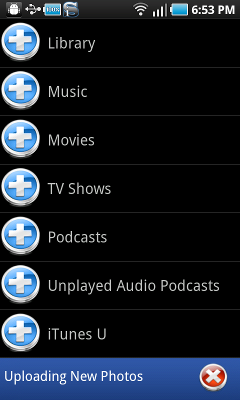
Uploads Photos and Videos
This step only happens if you've enabled photo or video uploading in the settings. Photos and Videos taken on your Android will be uploaded to your computer in the directory specified in the server settings dialog. Photos and videos will be removed from your Android after the upload if you set Delete After Upload to true.
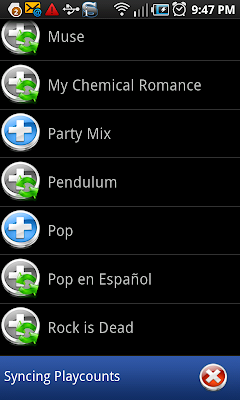

Syncs play counts
This step only happens in the full (non-Lite) version. Songs you've listened to on your phone since enabling play count logging will have their play counts, skip counts, last played, and last skipped values adjusted in iTunes. For more information about enabling play count logging, see the iSyncr FAQ - Advanced.
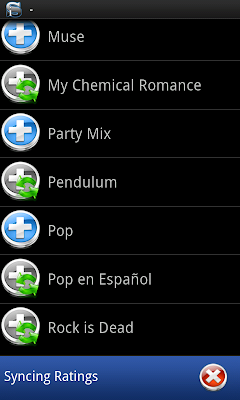
Syncs ratings
This step only happens in the full (non-Lite) version. Songs you've rated using the iSyncr Ratings Widget will have their ratings adjusted in iTunes. For more information about ratings, view the Ratings Widget FAQ.

Transfers songs between drives
If your phone has both internal and external storage, and you recently changed the download drive for one or more playlists, iSyncr WiFi will automatically transfer songs and playlists from the old drive to the new one for each playlist, so that songs won't have to be re-downloaded if they already exist on the other drive. Keep in mind that if you sync two playlists with overlapping songs to different drives, you will end up with duplicate songs on your Android device - some will be in internal memory for the playlist synced to internal storage, and some will be on your SD card for the other playlist.
Similarly, if you change your syncr folder, this step will also transfer your songs, playlists, and album art from the old syncr folder to the new one.

Deletes abandoned tracks
If the Delete Abandoned Tracks setting is set, this step will determine which files on disk, if any, are not referenced by any selected playlists, and automatically delete them. Again, use this setting with caution.

Determines if you have enough disk space to download your selected playlists
Before initiating song downloads, the app determines whether or not your currently selected storage drive has enough free disk space to hold them all. If there's not enough space, the sync will be cancelled.
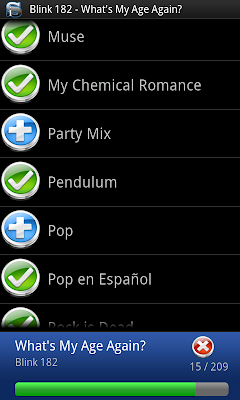
Downloads your songs
This is the fun part. Each song marked for download that is not on disk or whose size doesn't match what's on disk will be downloaded. The app will only download a song once, even if it's referenced in multiple playlists. Album art will also be downloaded automatically. During the download, you should see a progress bar for the current song, as well as a "total progress indicator" for the current song number out of the total number of songs to be downloaded.


Updates

Mac Support
Mac OS X support is implemented! Simply download and install the Mac WiFi Server onto your Mac.
Changing the syncr directory
Changing the syncr directory is now implemented. Simply choose the desired folder name in the iSyncr WiFi settings in the app.
Multi-Drive Sync
Multi-Drive Sync is now implemented! If your Android phone has both internal memory and external (SD Card) storage, you can now set individual playlists to sync to a specific drive by performing a "long touch" on one in the playlist view.

Caveats and Known Issues

Duplicate songs in different formats
If you have multiple songs in your library with identical artist, album, song names, and filenames, you may run into some weirdness. Since iSyncr WiFi considers songs with the same artist, album, name, and filename to be unique, if you have multiple copies of them with different file sizes, the app will attempt to sync and re-sync both versions of the songs over and over if they are selected to sync. To avoid this weirdness, uncheck one set of songs in iTunes and set "Sync Checked" to true.

Problems? Questions?

If you need help using iSyncr WiFi, or if you have any questions or comments, please email [email protected] for support.

Multi-Drive Sync - iSyncr 1.4.0+

Introduction

Ever since we first released iSyncr WiFi, our users who happen to have both internal phone memory and external SD card storage on their Android devices have been begging us to come up with an easy way for them to sync their iTunes media to both drives instead of being limited to just one drive at a time.
Now, with iSyncr WiFi 1.4.0 and later, we are proud to announce that iSyncr WiFi now supports painlessly downloading each playlist to the drive of your choice.

Setting Your Default Drive

The first thing you'll want to do to use multi-drive sync is to set your default sync drive. This is done easily enough; just access the Settings page in the app and tap the item called "Default Storage".


Then choose your default drive.


Selecting Your Sync Drive For Each Playlist

Now that you've selected your default drive, you're ready to choose your playlists to sync. Use the back button to go back to the main menu, then hit Connect to connect to your server. Now you'll see a list of playlists.
To select a playlist, just tap it with your finger, and the sync icon will change from a blue plus to a gray one, indicating that the playlist will be synced on your next sync. When you use the tap method, the playlist will automatically be synced to your default playlist.

Alternately, you can perform a "long press" on a playlist to sync, and you'll be given a menu from which to choose your preferred drive. Here you can choose to always sync the playlist to the default drive, or to specifically sync this playlist to internal or external storage.


If you've already selected a playlist for syncing, but want to change the sync drive, simply perform a long-press on it to change the sync drive.


If you have chosen either the internal or external drive for a playlist, there will be an indicator on the playlist icon; either "In" for internal storage, or "Ex" for external (SD card) storage.
You'll notice that this is also how you remove playlists from your sync. However, the playlist will remember your last drive choice for that playlist even if unselected.


The Sync Process

To sync your playlists to your selected drives, hit the green Sync Now button. The sync process is very similar to how it was before, but with a few added steps:

  • For each drive, the sync will check the other drive for any songs that match the selected playlists, and copy it automatically to the chosen drive. This saves the sync from having to re-download songs that already exist on the other drive.
  • If "Delete Abandoned" is set, the sync will remove any tracks not referenced by the selected playlists on a per-drive basis.
  • The sync will compare the available space on both drives to the storage required for the selected playlists per drive before syncing.
  • Each playlist is synced to its specified sync drive.

Caveat - Duplicates

Because of the way that playlist files reference the tracks that they contain, all songs for a given playlist must be on the same drive. This restriction has an annoying side effect: If you sync two playlists to different drives, but some of the songs in the playlists are the same, then you will end up with duplicate copies of those songs - one in internal storage, and one in external storage.
For this reason, if you wish to avoid syncing duplicates to your Android device, it's best to try and make sure that if you are syncing any playlists which may overlap, you should try to sync them to the same drive.
For example, let's say I want to sync my entire music library, but I want to sync roughly half of it to internal storage and the other half to external storage. Easy enough - just create two playlists in iTunes, one called something like "Music1" with the first half of my Music, and the other called "Music2" with the other half. Then just sync "Music1" to internal storage, and "Music2" to external storage.
Another example - let's say I have primarily Rock and Electronica in my music library. I could create a smart playlist in iTunes for any tracks whose genre is Electronica, and sync that playlist to internal storage, and another smart playlist for Rock, and sync that playlist to external storage. Any associated playlists (eg. "Dance Mix" or "Rock is Dead!") could also be synced to their respective drives, with no duplicates.
Of course, in both of these examples, if you want to sync any additional playlists which might straddle genres or bands, such as "iTunes DJ", "My Top Rated", etc., there's probably no way to avoid a small number of duplicates. Just accept it as a necessary evil =)


iTunes 11 Support


You've spoken up, and what did you say? You want to know iSyncr works with iTunes 11 before you upgrade from iTunes 10. After a day of running iSyncr/iTunes 11, Chris and I are not seeing any issues! Well done Apple!

On an aside, I really like iTunes 11. However, I've spent time scratching my head trying to figure out how to do some things in the new version. The great news is that I have eventually gotten there, so feel free to email us with any questions like "How do I add a podcast to a playlist in iTunes 11?".

If we do end up seeing an issue with iTunes 11, I'll post that information here.

-Justin

Pages