Syncing Back to iTunes
Submitted by JRT Studio on Tue, 06/14/2011 - 00:00
iSyncr has the ability to sync music downloaded to your Android device back to iTunes. It can do this using iSyncr WiFi or iSyncr USB. To help get you started with reverse syncing back to iTunes, we've created the following tutorial.
iSyncr is not designed to recreate your entire iTunes library. If you're wanting to recreate your iTunes library, we can use this tutorial from Apple to do this.
If you're wanting to sync ratings, playcounts and playlists from Rocket Player to iTunes, please refer to this tutorial.
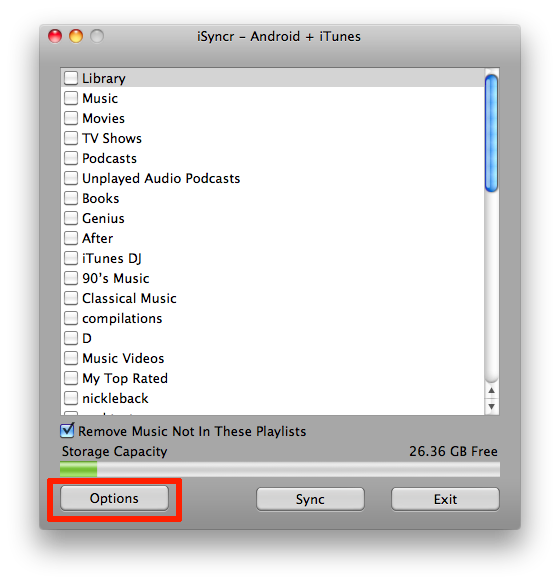
When you run iSyncr on your computer, you'll have the option to set up some options, by pressing the "Options" button.

- Upload MP3s --- This turns reverse syncing of MP3s on and off Note: not just MP3's can be uploaded - this is any music file.
- Delete MP3s ---If iSyncr uploads the MP3s to your computer successfully (which it validates with an MD5 checksum), do you want it to delete the MP3s from your Android device.
- MP3 Folder Name --- iSyncr does not copy all of the MP3s from your Android device to your computer. It only copies them from this folder name. By default, the folder is "AmazonMP3", which is where the Amazon MP3 application store the music it downloads.
- Upload Playlist Name --- The playlist in iTunes you want to add the MP3s to. It defaults to "iSyncr - Amazon MP3s", but you can rename it to whatever you want
- Upload Path --- Where would you like the MP3s to be located on your computer after the upload?
Things to consider when reverse syncing over USB.
- iSyncr will re-copy a file to your upload path if you delete the file from your upload path, but left the file on your Android device
- Setting the upload path to the special "Automatically Add to iTunes" folder is not recommended. iTunes will quickly delete the file and iSyncr exhibit the problem listed in right above this tip.
- The "MP3 Folder Name" is only a folder name. Slashes and special characters will be ignored.
- If the "MP3 Folder Name" you entered turns red, the issue is that the folder does not exist or is the same folder as the "Folder To Sync To Options". iSyncr requires you to type in a valid folder name.
Reverse Syncing over WiFi
Below we describe how to set up a reverse sync on the WiFi. First, launch iSyncr WiFi and then press the settings button.


Once in the settings, then you only have to press a couple of buttons to configure the sync however you like it.
- Upload Amazon MP3s - Toggles whether or not the app will scan the filesystem for Amazon MP3s and attempt to upload them to the server for you. This can be used for any music files, not just MP3's.
- Delete MP3s After Upload - Toggles whether or not the app should automatically delete Amazon MP3s on your phone after a successful upload. Take care with this option, since your only copy of these songs will be on your computer after a sync.
- Upload New Photos - Toggles whether or not the app will scan your Android device for photos and upload them to your computer automatically.
- Delete Photos After Upload - Toggles whether or not the app should automatically delete photos from your Android after a successful upload. Take care with this option, since your only copy of these photos will be on your computer after a sync.
- Upload New Videos - Toggles whether or not the app will scan your Android device for videos and upload them to your computer automatically. Note: iSyncr cannot sync videos on Android 5.0 and later
- Delete Videos After Upload - Toggles whether or not the app should automatically delete videos from your Android after a successful upload. Take care with this option, since your only copy of these videos will be on your computer after a sync.

- Amazon MP3 Path - This setting lets you choose where your music the files are stored on your computer's hard drive.
- Amazon Playlist - This setting lets you choose the name of the playlist that uploaded Amazon MP3s will be added to in iTunes.
- Photo Path - This setting lets you choose where photo files are stored on your computer's hard drive.
- Video Path - This setting lets you choose where video files are stored on your computer's hard drive.