Sync iTunes to an SD Card on Your Android Device Using iSyncr
iSyncr has the ability to sync to Android device's SD card or internal memory. Syncing to either storage can be performed over WiFi or USB. This tutorial will walk you through how to sync to your SD card over WiFi and USB.
First, we want to make sure that the SD card is mounted to the device.
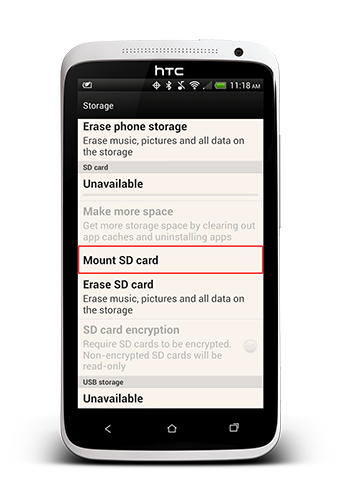
To confirm that the SD card is properly mounted and able to be synced to, go to "Settings > Storage." Mount your SD card by pressing "Mount".You will notice that when your SD card is mounted you're able to see available storage space.


Best to consult your device manufacturer's manual.
What class of SD card should I use?
We recommend using a class 4 or higher SD card by a reputable manufacturer - don't purchase a class 10 made by someone you've never heard of over a class 4 by a manufacturer with a good reputation.
iSyncr sync to SD card - WiFi
NOTE: Android KitKat (4.4) devices are no longer able to sync to the default "syncr" directory on an SD card. For more information view our blog.
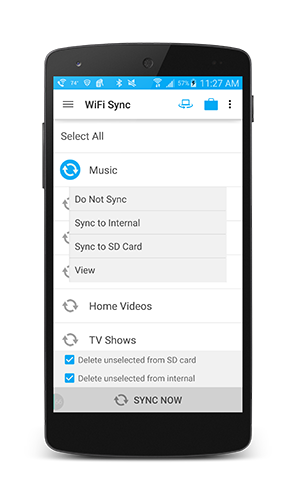
Once iSyncr is able to access the SD card, iSyncr will be able to sync to it over WiFi. For iSyncr to access the SD card, a /syncr folder (that's created on app installation) needs to be listed on the card. Long press on any playlist over WiFi and select "Sync to SD Card".
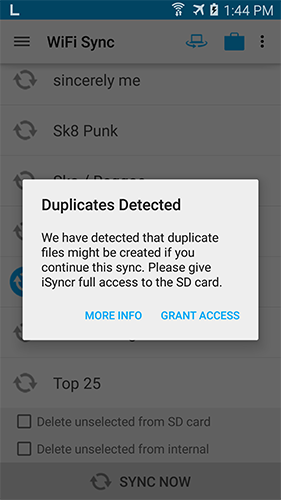
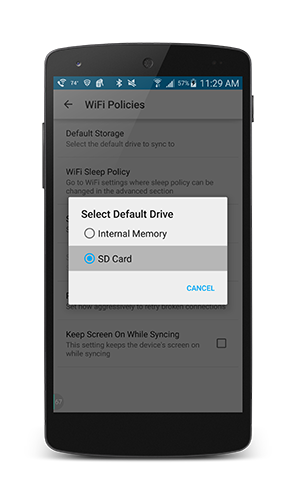
If you're on an Android 5.0 or later device, we need to grant access, then select your SD Card to gain access to the card. Follow the tutorial below to grant access, or see this tutorial

Once you press "Select" you'll receive a toast notifying you of granting access.
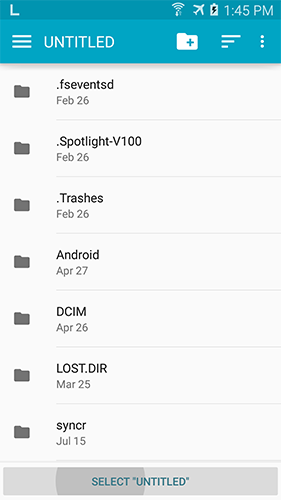
Note: If you're using an Android 4.4 device, we're only able to sync to the package folder on the SD card, specifically "Android/data/com.jrtstudio.iSyncr/". For more information please review this blog post.
I don't see this default location setting under WiFi Policies?If you don't see the default location setting, go to your device's settings and make sure that the SD card is mounted. iSyncr must be able to recognize your storage before it is able to sync to it. Contact us for support to sync to the SD card.
Why is it syncing to the internal storage when I've followed these steps?
Certain device's have swapped the internal vs. SD card storage. Some devices use a non-default storage path for internal vs. external storage. This is common using custom ROMs (Cyanogenmod).
iSyncr sync to SD Card - USB
Syncing with a 3.0+ device over USB:
Mac:
Your device over an MTP connection will not be able to be seen in Finder. Google created an application for Mac to be able to recognize MTP connections called Android File Transfer.
Note: iSyncr will not be able to make a connection with Android File Transfer Installed. If you want to test your connection, install Android File Transfer (This is useful for determining if you're using a data cable instead of a charge cable) then uninstall Android File Transfer and reboot your Mac. iSyncr will then be able to make a connection without being interrupted or having the "Failed to load device" message.
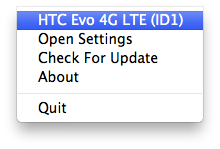
Once your device is loaded on your Mac over MTP, you will be able to chose what storage location to sync to:
|
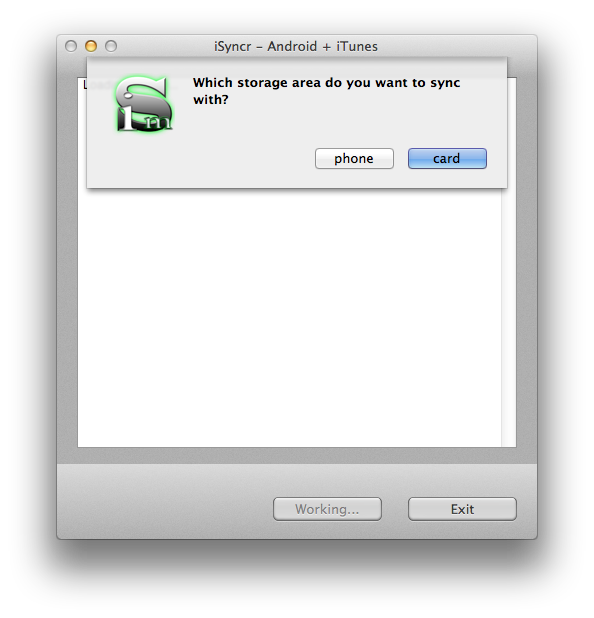
|
PC:
iSyncr is able to sync to the SD Card over an MTP (Media Transfer Protocol) connection as long as the computer is able to recognize your device's storage locations.Note:The application can only sync to storage locations the PC recognizes over USB. If you're using a PC running Windows XP, we need to update to the latest version of Windows Media Player 11 to be able to make an MTP connection with your device.
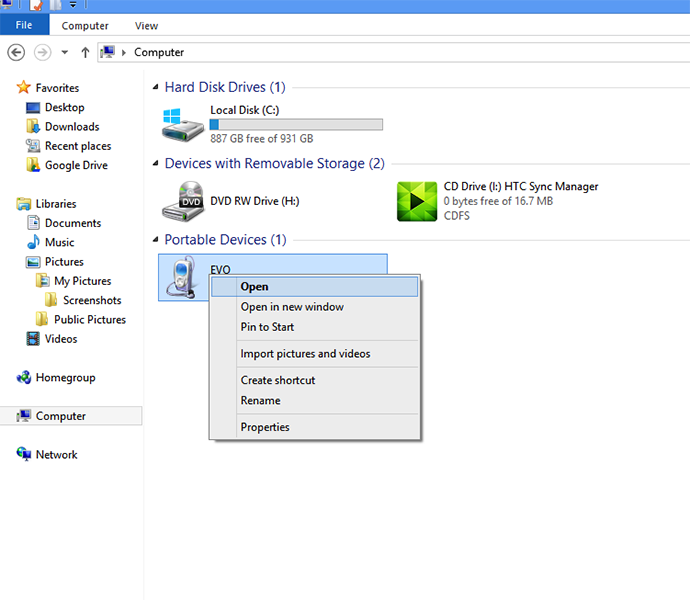
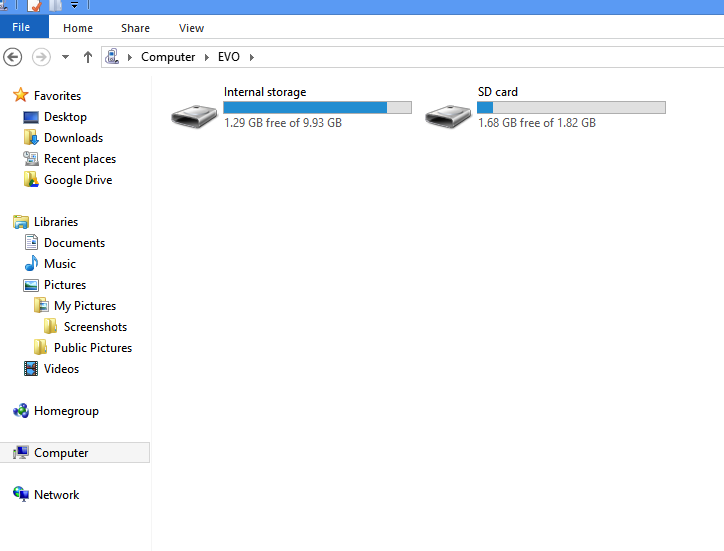
Connect your device. In Windows Explorer, you'll be able to see your device listed as a portable device. Open the device to access the two storage locations.
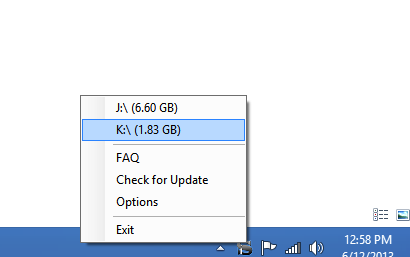
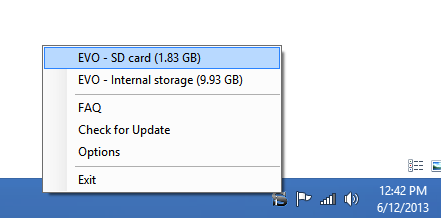
Once the storage locations are able to be seen, right-click iSyncr Desktop and access your storage location. Select the SD card.
Syncing over USB using a 2.3, (Gingerbread) or 2.2 (Froyo) device:
Mac:

With your device, the application will be able to be seen in Finder over UMS.
PC:
With UMS, your device's storage locations should automatically appear in Windows Explorer.

Right-Click on iSyncr Desktop to access the storage location or launch the application through the exe.